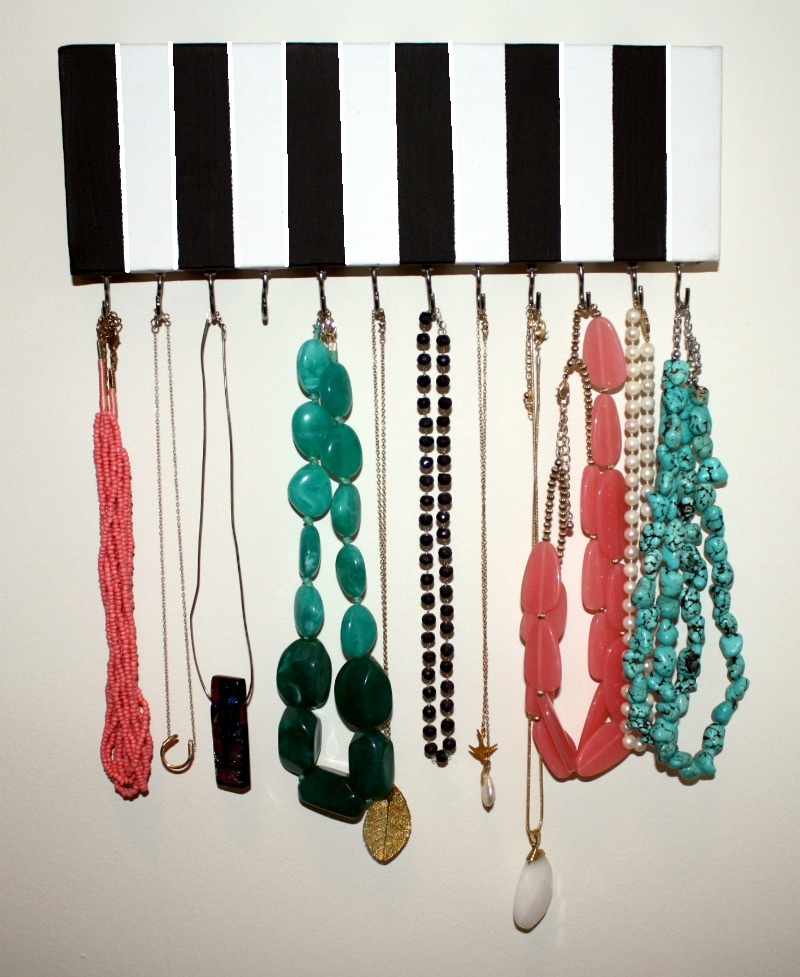
DIY // jewelry hanger.
I’ve been long searching for the perfect jewelry hanger. I have a lovely mirrored jewelry box but everything seems to end up a tangled mess if I use the hooks on its lid. I’m lucky enough to have a walk in closet in my new apartment and wanted a pretty way to display my necklaces.
So, I made one. And it was super cheap & easy – totally gets the job done.
Here’s what you’ll need:
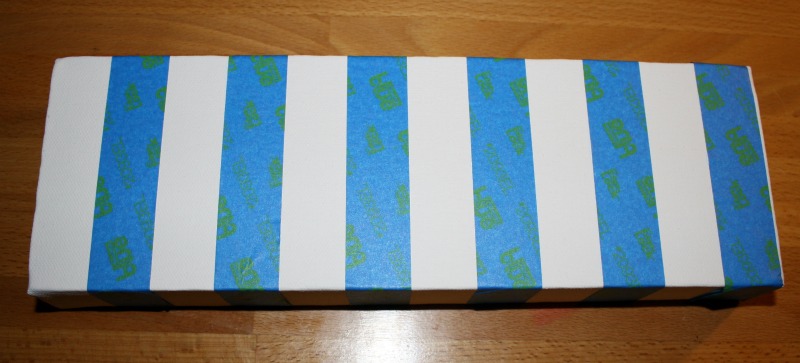
- Small Canvas (I used a 4″ x 12″ – you can get these at any craft store)
- Painter’s tape
- Acrylic Paint
- Cup Hooks
- 2 soda can tabs
- 2 small screws
- Hanging nails
I chose to do painted stripes on mine but you could decorate in any way you’d like. I think decoupaged scrapbook paper or metallic polka dots would be fabulous!!
Step One: Prep your canvas for painting – I taped off my stripes using 1″ thick painter’s tape
Step Two: Paint Stripes – be sure to cover the sides of the canvas as well and use as many coats as needed to get even coverage
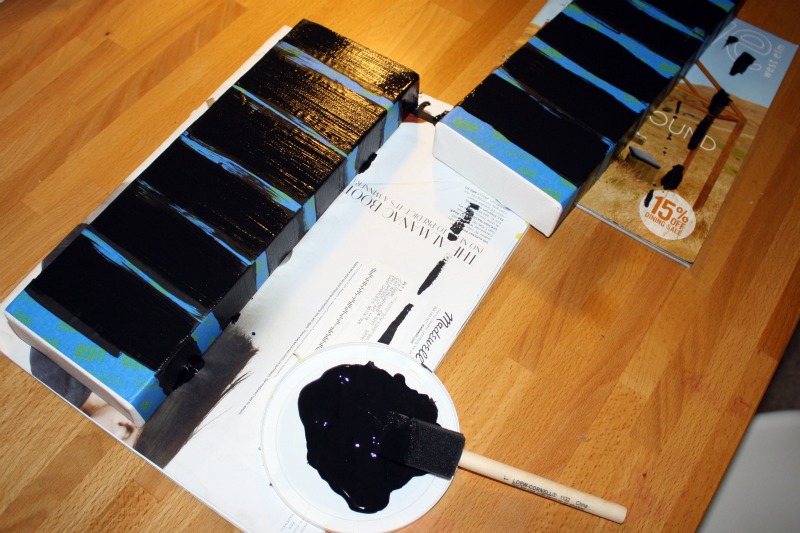
Step Three: Once paint has dried, carefully peel off painter’s tape.
Step Four: Mark how far apart you’d like your hooks. I chose to do 1″ space between each screw, and used my stripes as guidelines.
Step Five: Screw the cup hooks into the wooden frame of the canvas. Mine went in very easily and I was able to do them all by hand.

Step Six: Attach two soda tabs to the back of your jewelry hanger using a basic screw. This will be the easiest way to hang and keep your jewelry hanger balanced.
Step Seven: Hang up all of your pretties & enjoy!!